| Author | Post |
|---|
Jack Cronkhite
Member

|
Posted: Tue Jun 2nd, 2009 03:16 am |
|
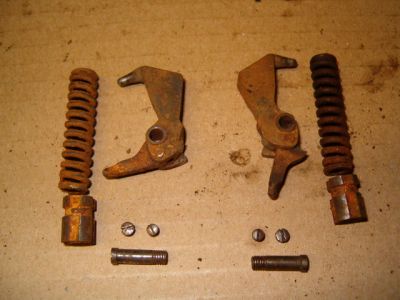
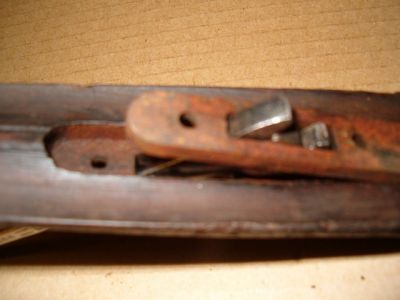
Hammers Mainsprings Plungers Screws (Just a bit of fun removing this group)
____________________
Hunt ethically. Eat heartily.
|
Jack Cronkhite
Member
|
Posted: Tue Jun 2nd, 2009 03:17 am |
|
Extractor & Screw
____________________
Hunt ethically. Eat heartily.
|
Jack Cronkhite
Member
|
Posted: Tue Jun 2nd, 2009 03:22 am |
|
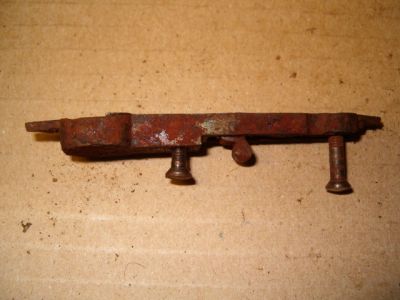
Latch & Screws
____________________
Hunt ethically. Eat heartily.
|
Jack Cronkhite
Member
|
Posted: Tue Jun 2nd, 2009 03:26 am |
|
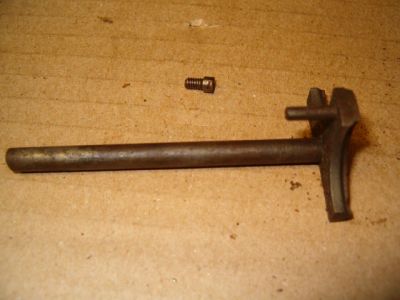
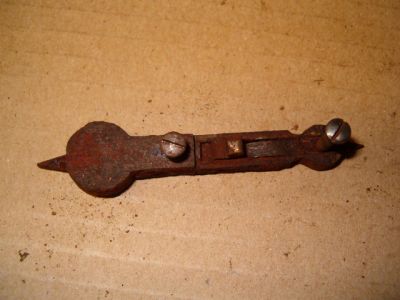
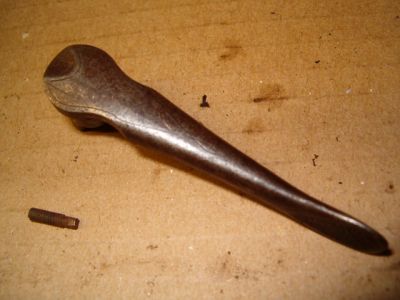
Top Lever & Screw
____________________
Hunt ethically. Eat heartily.
|
Jack Cronkhite
Member
|
Posted: Tue Jun 2nd, 2009 04:02 am |
|
So, that will be all my before pics. The sling swivel is still attached. Indirect heat did not melt the solder but I could feel the barrels getting warm so I stopped. Chisels next. The body of the action is almost clean. There is even a dot of case color under the top end of the lever.  The rest of the metal is a blue/black color. The rest of the metal is a blue/black color.  All that has been used is penetrating oil, rags, thumbnail, q-tips, toothpicks, nylon brush and small blade screwdriver to clean machined edges. Some of the rust was almost a steel skin where there were moving parts under pressure. Still lots of effort required but the progress thus far is satisfying. The top-lever spring (flat type) is broken All that has been used is penetrating oil, rags, thumbnail, q-tips, toothpicks, nylon brush and small blade screwdriver to clean machined edges. Some of the rust was almost a steel skin where there were moving parts under pressure. Still lots of effort required but the progress thus far is satisfying. The top-lever spring (flat type) is broken  and that welded sear spring won't be going back in. I can temporarily use parts from the family VH but will try to find those pieces over time. and that welded sear spring won't be going back in. I can temporarily use parts from the family VH but will try to find those pieces over time.
The toughest separation of parts has not been metal/metal. I still cannot remove the fore-end iron from the forestock. The metal/rust/wood bond is unreal. The wood is ugly but I intend to keep it and do what I can to refurbish.
Just in case this isn't ready for fall, my wife agreed it would be a really good idea to buy a very nice looking VH with no issues that appeared one day on GA. A deal was struck and it will find its way from NY to SK over the next few weeks. I have not contracted the "itis", I can quit any time (I think).
Cheers,
Jack
Last edited on Tue Jun 2nd, 2009 04:06 am by Jack Cronkhite
____________________
Hunt ethically. Eat heartily.
|
Jack Cronkhite
Member
|
Posted: Fri Jun 5th, 2009 06:20 am |
|
Looking for opinions.
You can see the rust covering everything. I am slowly getting rid of it. What is coming through is a fair bit of the original barrel blue remains. The action is silvery blue and black with some fine pitting. Internal parts are mostly a dark brown or blue/black or worn to silvery steel. Some screw shafts are heavily pitted but most heads are reasonable.
Once I have it as clean as I can get it - what next??
Would you keep it as is with just a light coat of gun-oil to stop further deterioration or re-blue anything?
I recall someone said the internal parts were not blued, yet they look kinda dark blue. What was done to the internals at the factory to have them look as they do??
Thanks,
Jack
____________________
Hunt ethically. Eat heartily.
|
Thomas Schiffer
Member
| Joined: | Tue Mar 10th, 2009 |
| Location: | |
| Posts: | 8 |
| Status: |
Offline
|
|
Posted: Fri Jun 5th, 2009 02:30 pm |
|
Jack: Good to see you cleaning it up and putting it back together. I'd certainly see what it looks like with a simple clean-up and a bit of stock work. I have been amazed at what you can find under a seemingly terminal case of rust! It'll make a fine field gun that would be hard to hurt with use. VH No. 104642 made it all the way down here to Kentucky and has been happy here in spite of some misdemeanors (recoil pad and buggered a few buggered screws in the trigger plate on a trip to Minneapolis many years ago). It has been used by three generations in this family, starting with my grampa. Did you decide not to remove the hinge-pin? I understand it is not easily done, but am curious as to what it looks like. In mine, the "screw" slot is no longer "north and south" but barrel is on-face and tight. Good luck with your project.
ts
|
Richard Flanders
PGCA Member

|
Posted: Fri Jun 5th, 2009 02:51 pm |
|
Once I've cleaned all the rust off, I coat all internal parts with Ballistol. Just soak them and let them drip dry then reinstall. It seems to leave a coating that does not run off entirely and protects them very well. I've taken a gun so treated apart after a year and it's still just as it was when put together.
Last edited on Fri Jun 5th, 2009 02:52 pm by Richard Flanders
|
Jack Cronkhite
Member
|
Posted: Fri Jun 5th, 2009 04:00 pm |
|
Thanks gents. I'm looking at her as a gun with character so my inclination is to get through the clean-up and necessary repairs. All numbers match, including wood so I'll try to keep it together and find one sear spring and top lever spring somewhere. I am still unable to remove forend iron - really stuck to the wood and it has been soaked a lot. I guess it needs a lot more.
As for the "hinge pin" ( joint pin, joint pin screw and joint roll), I'm at the point of considering discretion to be the better part of valor. Nothing has budged so far and I read on another thread that one needs a press to remove and reinsert the joint roll, so whatever rust issues might be there don't seem to be an interference with functionality.
Cheers,
Jack
____________________
Hunt ethically. Eat heartily.
|
Jack Cronkhite
Member
|
Posted: Sun Jun 7th, 2009 05:55 am |
|
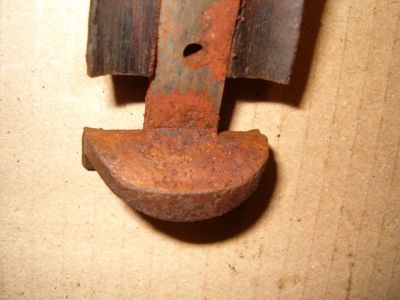
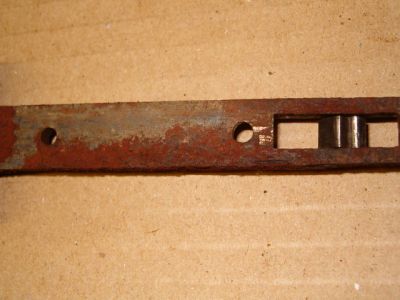
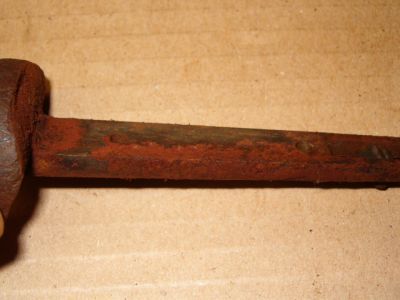
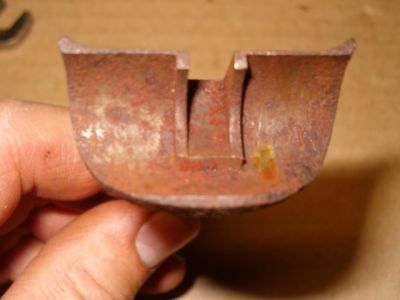
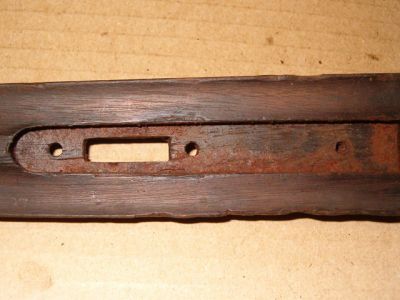
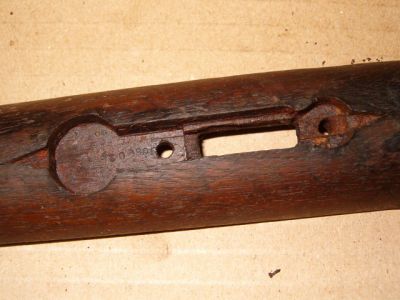
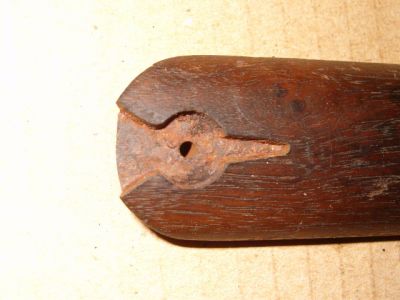
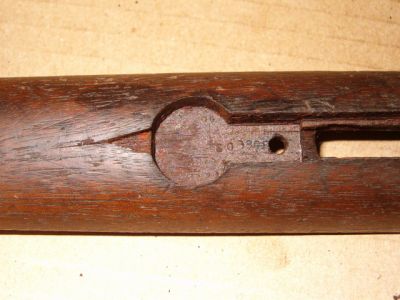
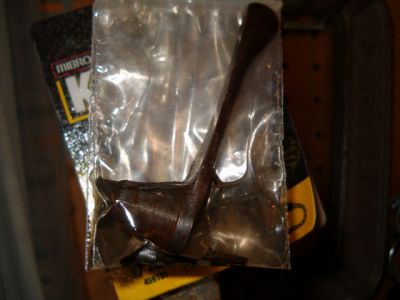
--Okay, I lied. Here are a few more "before" pics. Today was the day that I gave up being gentle with the forend iron. I tried many ways to gently remove it, from light tapping with an amber hammer, to heavier smacking with a rubber mallet, to inserting a pin punch into the screw holes and gently smacking sideways with a brass hammer, all to no avail. By the way, it has been soaking in penetrating oil from the get go. I tried a gentle pin punch tap on the forend tumbler but thought better of that but that got me thinking about completely filling the slot in some manner that would hold the full width of the tumbler to spread the forces across its entire width. I found I could do that with an 11mm box end wrench. So, the wrench was placed in the vice and the tumbler caught with about 1/2 inch of clearance from the vice jaws. With that solid set up, a couple taps on the wood with the rubber mallet finally raised the metal above the wood. A little more wiggling and it was free. Here's a few pics. Remember, this has been soaking for a couple of weeks and the rust is still dry in many areas. Sorry about focus on this shot to illustrate the wrench solution. The second pic is wood not metal.
Last edited on Sun Jun 7th, 2009 06:25 am by Jack Cronkhite
____________________
Hunt ethically. Eat heartily.
|
Jack Cronkhite
Member
|
Posted: Sun Jun 7th, 2009 06:00 am |
|
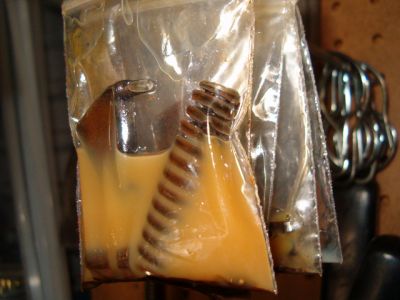
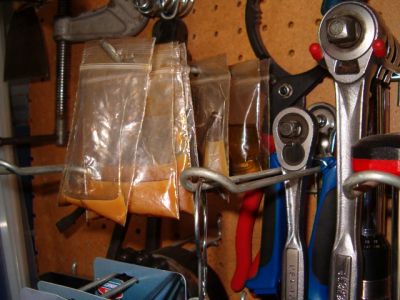
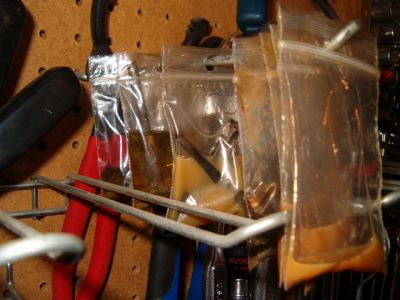
Here are some "in progress" shots. I kept parts more or less together in small plastic bags filled with penetrating oil and left them hanging for a while. Then, a clean up and back into a new bag. First images are of initial soak, then a second soak and even a third. Each time, more of the rust goes and more of the metal shows.
____________________
Hunt ethically. Eat heartily.
|
Jack Cronkhite
Member
|
Posted: Sun Jun 7th, 2009 06:15 am |
|
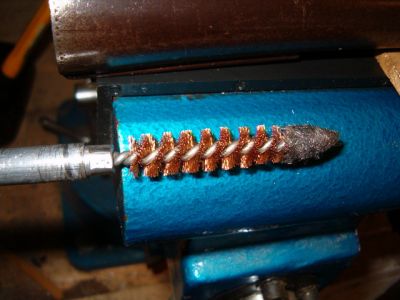
Two contrived solutions.
A .410 brush with tip wrapped in steel wool did a good job on the action mainspring cylinders. You saw how rusted the springs and plungers were. The whole area was actually a solid cylinder of rust. I don't have a hone small enough to get in there but the bore brush/steel wool combo is doing a decent job.
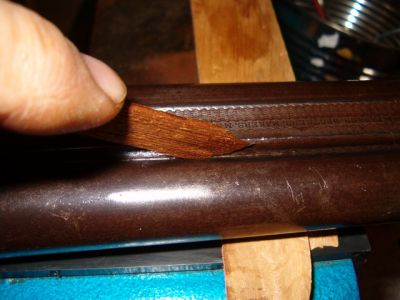
The top rib/barrel join was completely filled with rust. I started at it with a jeweller's screwdriver blade and then thought better of it. I found that cedar shims worked amazingly well. Snapping piece after piece and running it along the join has eventually cleared out the rust. The nice thing about the cedar is it always broke in a manner that gave me a sort of keen wooden blade - solid enough for the job and gentle enough to leave not a scratch behind.
____________________
Hunt ethically. Eat heartily.
|
Richard Flanders
PGCA Member
|
Posted: Sun Jun 7th, 2009 06:27 am |
|
I do the exact same thing with the brush/steel wool when necessary. I chuck the rod in a cordless drill and have at it and the rust goes away pretty quickly. The wood on the forend looks pretty good actually; the metal is a mess but will mostly clean up ok considering. I also use wood on that rib junction. Round toothpicks work well and I bet that cedar did very well.
|
Jack Cronkhite
Member
|
Posted: Sun Jun 7th, 2009 04:29 pm |
|
Richard: I used a lot of toothpicks in the action here and there. They broke immediately on the rib/barrel exercise. The shims gave me enough rigidity to be able to apply rust grinding pressure.
The mainspring cylinders are fairly pitted. I know that makes no difference to functionality but now I'm really into this, I would like to smooth them out somewhat. Is there a short cylinder hone that would fit? If I understand barrel hones, a .410 barrel hone may not work as the springs would overcome the stones in such a short distance and end up not leaving a cylindrical bore for the mainsprings. Any thoughts on this??
Cheers,
Jack
____________________
Hunt ethically. Eat heartily.
|
Richard Flanders
PGCA Member
|
Posted: Sun Jun 7th, 2009 05:04 pm |
|
I guess I wouldn't try to smooth them; I'd just try to get all the rust out then treat them with Ballistol to keep them that way. But... perhaps a home made hone of a small dowel wrapped with wet/dry paper would work to hone them some. Slit the dowel the put one end of the paper into to keep it from just spinning on the dowel then wrap enough around the dowel to give it some spring and be large enough to exert pressure when put into the hole and spun with a drill. Or, alternatively, take a new bore cleaning mop and glue one end of the paper strip to it with contact cement or gorilla glue then wrap some around tightly, stick it into the hole and let it expand and spin it with a drill. You get the picture; there has to be a way to dream up something with what you have or can easily get. Keep it lubed with water or very light oil as you hone to keep the paper from clogging with removed metal/rust. Start with coarser paper then graduate to the finest, which in my collection is 2000 grit paper, or 0000 steel wool. My Rutland tool catalog(1824 pages of pure ecstasy which NO ONE should be without!)800-289-4787 has carbide flex ball hones as small as .25"($10.95!) between 120x-320x grit and stainless steel deburring brushes(v stiff) as small as .024"($4.26) that would do you just fine. If they don't have what a tool guy needs, he doesn't need it. Give them a call and get a catalog..... I wouldn't be without one.
As for removing rust on parts like you have soaking, I use a GUNK product called, "Heavy Duty Cooling System Cleaner" that's for automotive cooling systems. It's a caustic I think as you can't use it on aluminum. You make up a weak solution of this stuff, toss everything in and the next day take them out and wipe ALL the rust off to bare metal with a paper towel or rag. Amazing stuff and won't harm unrusted steel. I've used it for decades on rusted old tools I pick up at old mines around Alaska. And it will clean an old radiator and engine block out like you have never seen. Cooling system "flushes" are absolutely useless and pedestrian compared to this stuff. I consider it one of lifes true miracle inventions. For parts where you can't get at and remove the rust there is a Loctite product called "Extend Rust Treatment" that my brother in law, a body man who works on some old heavily rusted cars in Michigan gives his highest recommendation. This stuff soaks into and stops rust from advancing and he says it REALLY works. On the bottle here it says: "Destroys rust, Seals and protects metal, Dries to a tough protective primer coating" that can be painted over. Perfect for the rusted quarter panels of old cars that you can't or don't want to cut out and replace, or for nooks and crannies in guns that you can't get at and want to stabilize. Loctite P/N 75430.
Last edited on Sun Jun 7th, 2009 05:43 pm by Richard Flanders
|
Hugh Rather
PGCA Member
| Joined: | Thu Jan 25th, 2007 |
| Location: | USA |
| Posts: | 150 |
| Status: |
Offline
|
|
Posted: Sun Jun 7th, 2009 05:08 pm |
|
| How about a close fitting wooden dowel slotted to hold 400 to 600 grit paper with oil. Proceed slowly,you only want to polish ,those pistons fit closely,don't want binding . This gun reminds me of a 16 gauge I cleaned up that I called the Zack Taylor gun after a Parker he described in the classic "Successful Waterfowling"book.He spoke of it being "driven out of sight"in mud and rusted in salt water but it was his favorite. Last edited on Sun Jun 7th, 2009 05:29 pm by Hugh Rather
____________________
John 3:16
|
Richard Flanders
PGCA Member
|
Posted: Mon Jun 8th, 2009 03:07 pm |
|
Jack: Rutland has a adjustable H/S steel bladed reamers with ranges between 1/4" - 9/32" going up to 2-3/4"- 3-11/32". The small one is only $11.28. Pg 105 of catalog no. 54.
|
Jack Cronkhite
Member
|
Posted: Wed Jun 10th, 2009 06:00 pm |
|
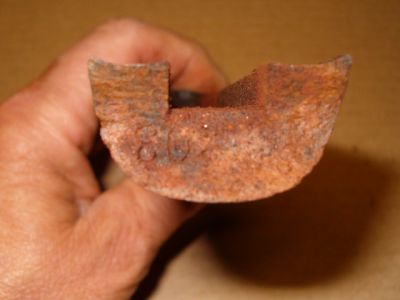
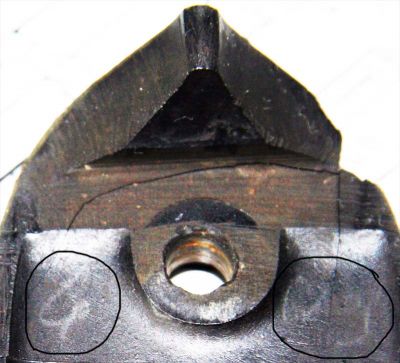
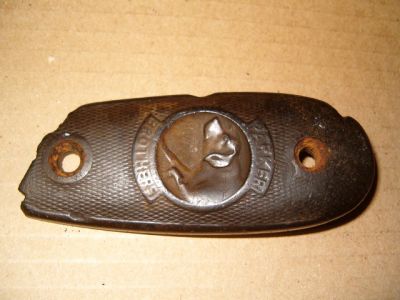
Another find under a coat of rust and mud. I don't recall seeing a number on the back of other buttplates but maybe I wasn't paying attention. This may be a bit difficult to see. Almost looks like pencil lead. Anyway, at home under good light it is clearly
6 03
So, every numbered piece on this gun matches.
Has anyone tried to re-build a butt-plate? I'm thinking fiberglass and a bit of carving might work. Other thoughts???
Is the buttplate "hard rubber"? I recall someone saying mineral oil is good for cleaning these. Is that recollection correct? Also, any other products anyone has used successfully?? Thanks, Jack
Last edited on Wed Jun 10th, 2009 06:15 pm by Jack Cronkhite
____________________
Hunt ethically. Eat heartily.
|
Dave Suponski
PGCA Member
| Joined: | Thu Jan 6th, 2005 |
| Location: | Connecticut USA |
| Posts: | 1027 |
| Status: |
Online
|
|
Posted: Wed Jun 10th, 2009 07:23 pm |
|
Jack,Parker dogshead butt plates are made from "gutta percha" This is a type of hard rubber. A few years back my wood guy"The Stock Doctor" Dennis Smith repaired one on a VH grade gun using colored acraglass.To this day I still cannot see the repair.
As far as the pencil marking on the back I have seen many marked this way,
Last edited on Wed Jun 10th, 2009 07:24 pm by Dave Suponski
____________________
Dave....
|
David Hamilton
PGCA Member
|
Posted: Wed Jun 10th, 2009 07:53 pm |
|
| Jack, You might save a bit of time by buying a new Dog's Head Butt Plate from Galazan. David
|

Current time is 06:51 pm | Page:   1 2 3 1 2 3   |
|