
|
| |||||||||||||||||||||||||||||||||||||||||||||||||||||||||||||||
 01-01-2021, 02:09 PM
|
#73 | ||||||
|
Will you share more detail on doing this sharpening? Brand and size for knife edge file? How do you hold the cutter for sharpening? Other details for success? Thanks.
|
||||||

|

|
||||||
|
01-03-2021, 05:04 PM
|
#74 | ||||||
|
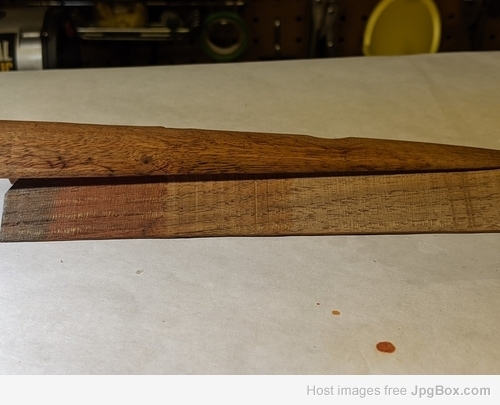
I believe I have achieved the reddish color tone match using the alkanet red oil. Practice wood from the same period 1890's above with three applications, original Parker stock finish below.
I tried BLO as the first application on the other side of the forend and that produced a color tone with too much brown. 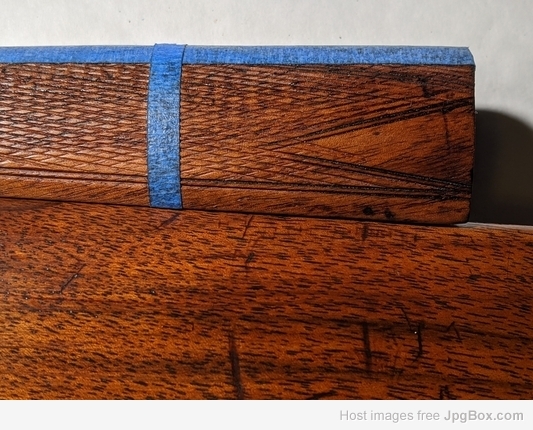
|
||||||
|
|
|
||||||
|
01-13-2021, 02:10 PM
|
#75 | ||||||
|
I need some advice. As I make progress on my recutting of the checkering I have arrived at working on the mullered border. The first photo shows the original border with very little wear on the right. I have re-established the border on the left. The original border on the left consisted of a slight amount of original pattern in the form of lines and a slight border profile.
The second photo shows the tools I have for this work. The Dem-Bart cutters are 1) 2-28, 2) BC-N concave, 3) F1, and 4) 4-40 machine screw tool. And a curved blade knife. As I continue along the checkering pattern I will be losing any pattern lines for the border as it has been completely erased by hand wear. This will make re-establishing the border more difficult. I watched a YouTube video (MNR Custom, LLC) on this type of border and the fellow uses a 28 lpi cutter to establish the border lines for the mullered border (on a 22 lpi checkering pattern and not a Parker). A couple of observations at this point. 1: the BC-N cutter is wide and aggressive so care is required to match the original border. 2: there are two lines, one on each side of the border, very thin. How are these cut? Which tool? (see #3) 3: I find that a 2-28 cutter will give me the required center line for the border. Is this a good means to center the border? (yes). 4: The BC-N is used to start the border and the 4-40 tool to finish the mullered border. 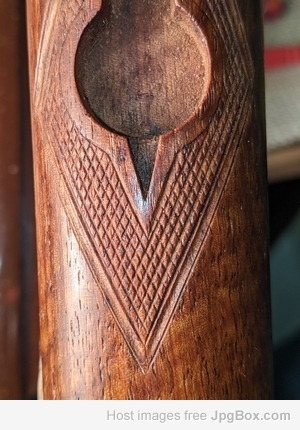 
Last edited by Cameron Thraen; 01-19-2021 at 08:14 PM.. Reason: Clarification on a couple points. Added point #4. |
||||||
|
|
|
||||||
| The Following User Says Thank You to Cameron Thraen For Your Post: |
|
01-13-2021, 03:25 PM
|
#76 | ||||||
|
If that picture is an example of your own cutting of a mullered Parker border, I think it is about perfect!!
It's not too wide, it's just right. Bravo! Here's an original unretouched Parker mullered border. Granted, it's a Grade 4 but the grade makes no difference with the mullered border. There were several different people employed by Parker and Remington during the various periods of production. A few of them employed a more pedestrian interpretation of mullering while the more expert of them employed the wider concave mullering. .
__________________
"I'm a Setter man. Not because I think they're better than the other breeds, but because I'm a romantic - stuck on tradition - and to me, a Setter just "belongs" in the grouse picture." George King, "That's Ruff", 2010 - a timeless classic. |
||||||
|
|
|
||||||
| The Following 5 Users Say Thank You to Dean Romig For Your Post: |
|
01-14-2021, 09:52 PM
|
#77 | ||||||
|
Cameron, I've never used a cradle or a concave cutter. I prefer holding and constantly turning my work as I checker. I use masking tape to lay out master lines. I freehand the muller border with a series of cutters and files. I prefer Dembart and Ullman. I've also made some of my cutters. I don't know if there's a right and a wrong way. I study other's work, if I like it, I'll try to duplicate their cuts. Depth of the cut is important. Your work is looking good! Take your time....
|
||||||
|
|
|
||||||
| The Following 3 Users Say Thank You to Chris Robenalt For Your Post: |
|
01-15-2021, 06:36 PM
|
#78 | ||||||
|
For those interested, and following here are a couple of photos on my progress. The original border on this Parker is only +0.070 wide measured from thin outside border line to opposite border line. This is a 28 lpi pattern. The actual mullered border is even narrower.
This photo shows the worn smooth border on the left: 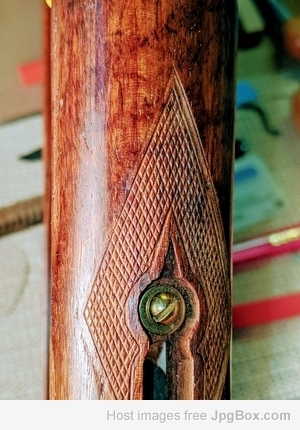 This photo shows my refurbished border on the right: 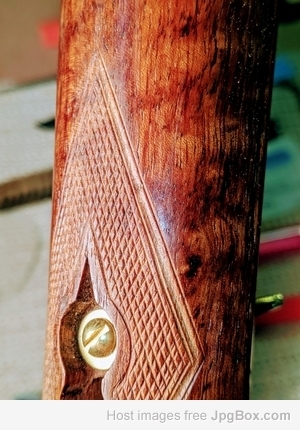 A few more lines to go. I need new eyes. |
||||||
|
|
|
||||||
| The Following 14 Users Say Thank You to Cameron Thraen For Your Post: |
|
01-20-2021, 09:50 PM
|
#79 | ||||||
|
Take your lines all the way to the border and back cut Cameron. It will make your checkering and borders really pop!
|
||||||
|
|
|
||||||
| The Following 3 Users Say Thank You to Chris Robenalt For Your Post: |
|
01-21-2021, 11:14 AM
|
#80 | ||||||
|
I use an S-1 Dembart tool mounted so that the cutter cuts as it is pulled away from the borders and in very tight areas I use an metal engraving tool that is V-shaped to finish around the borders.
|
||||||
|
|
|
||||||
| The Following User Says Thank You to Craig Budgeon For Your Post: |
 |
|
|


 Linear Mode
