
|
| ||||||||||||||||||||||||||||||||||||||||||||||||||||||||||||
 10-03-2016, 02:50 PM
|
#33 | ||||||
|
Paul
It’s conceivable that Remington had a nesting fixture made to position the barrels properly for choke work from the muzzle. That said, it would HAVE to be done to a choke that has already been ground/cut relative to the bore/breech face just awaiting final size, otherwise how in the world would they know ‘where’ the chokes or the bores are? It occurs to me that the water table would have to be datum “A” and the breech face of the barrel would be datum “B” leaving the chokes ‘somewhere’ relative to that, even if positioning of the chokes/bores required adjustment after the datums are established. I can envision a couple ways to skin that cat so far as fixtures are concerned. You mentioned that you’re doing choke mods from the muzzle & believe me, I’m not doubting that at all and I’m not doubting the integrity of your work whatsoever. Respectfully though - how are you tramming the bore and how do you determine geometry relative to the breech face before mod? — William - don’t underestimate yourself, you are asking the right questions. You are correct, any choke work is only going to result in a longer straight section unless a reamer is ground with proper geometry. If I get serious about altering a choke, the very first thing I will do is cast the choke area so I can see just what it is I’m working with so far as choke geometry is concerned. If I can steer you in one direction with respect to machining..it sounds funny but, forget the numbers..obviously size matters however within the world of professional machining & manufacturing, it’s all about geometry. A perfectly sized choke doesn’t amount to anything if you don’t know where that hole is relative to the other functional elements, in this case..Datum “A” (watertable) & Datum “B” (breech face) — In practical use this is tantamount to your hand placement acting as Datum “A”, cheek acting as Datum “B”, & shoulder acting as Datum “C”. Think about it, what is this doing and why is consistent mount along with firm placement so crucial? Because you are handling the manufacturers Datum ‘A” (watertable), Datum “B” Breech face, and Datum “C” (chokes) If the manufacturers intended design is not wielded properly what happens? You miss (Obviously this ignores eye coordination etc) — I will respectfully side with Parker on this one ~ all choke work should be done from the breech. That said, I approach this from a manufacturers perspective so take it for what it’s worth. |
||||||

|

|
||||||
|
10-03-2016, 04:28 PM
|
#34 | ||||||
|
Scot, you don't have to " cast the choke area " - just get a inside mic and write down a reading every 1/4". JMHO, but I believe a lot of people think removing .005 of material on a side [ that's .010 total ] is rocket science. I used .005 as an example and that would be like changing a full choke to modified. I'm also a backyard machinist, but if someone has a basic knowledge of machining then you should be able to remove that .005 without screwing it up. Opinions are like a**holes, everyone has one, and that's mine. No offence to anyone - have a good day.
__________________
Paul Harm |
||||||
|
|
|
||||||
|
10-03-2016, 06:34 PM
|
#35 | ||||||
|
My father opened a Parker and so did I. Both were horrible mistakes that give me bad dreams. Papa's was a VH 12 with 32" barrels and was his duck gun. When steel shot became the law he opened both barrels to improved cylinder and the chambers to 3"'s. Steel shot did not rifle the barrel and it continued to pull ducks out of the ozone layer. I had a GH that was improved cylinder (.012 constriction) and I had no idea what the left barrel was, but I had it opened to IC (.010). It was my sporting clays gun and I did well with it. I just wish both were still original.
|
||||||
|
|
|
||||||
| The Following User Says Thank You to Harry Collins For Your Post: |
|
10-03-2016, 09:46 PM
|
#36 | ||||||
|
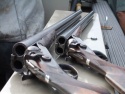
Believe the photo of the smith is August Pachmayer in his shop late 50's or 60's. He had the reputation of "Master Gunmaker" and his work was highly regarded. My smith has done very nice work opening chokes for me on two guns sleeved full and full. Set to light modified and a bit over modified. Perfect for birds in the field and they are working really well on the clays course from close in to far out. Centered clays are crushed and they allow the gun mount with no rush for field shooting. I do not open chokes on original barrels and do not like to change from the constriction they came with. 43 and 45 points was just stupid tight and really needed something done.
|
||||||
|
|
|
||||||
|
10-03-2016, 11:52 PM
|
#37 | ||||||
|
Thank you Eric..your post got me looking at the pic again.
At quick glance I mistakenly identified that machine as a cyl. grinder less the tailstock & modified for the specific task. I was wrong - that is a honing machine..one built for deep hole work. As William pointed out, the barrels traverse left to right. The stones can be adjusted as material is honed away..it appears he is making a stone adjustment to do just that in the photo. |
||||||
|
|
|
||||||
|
10-04-2016, 07:06 AM
|
#38 | ||||||
|
I just opened up a couple of Ponsness Warren Shot bushings on my lathe. How much to open was guess work & to increase drop 1/16 oz does not take much. I made a tool to hold 280 grit paper. Put the bushing in the 4 jaw indicated center and lapped. Few papers through the bushing took it out weighed a shot drop, and chucked it up again. Slow part is checking then re-chucking, half a dozen times but came out perfect.
Next one I made up a boring bar and cut the first step, it dropped right on desired weight so I omitted the lapping. Bushing works fine inside surface is not smooth. Not a choke job but the principal is the same. Seems to me to do a choke right same method, lapping and testing is the way to go. Proper lead lap not my quick paper rig. I say lead because that's how rifle barrels are lapped. Might be a smooth bore large hole stone would work better. Very labor intensive all the set up test then set up again. Although a lap cuts fairly fast if it fits well and carries aggressive grit. Going slow and checking progress on the pattern board could give good results. That rig in the photo would be a good set up to open with a lap. Appears he can remove and re-set fairly fast. More than one way to do a job all they all work. I am probably over thinking it. William |
||||||
|
|
|
||||||
|
10-04-2016, 08:50 AM
|
#39 | ||||||
|
Brownells sells flex hones, 180 grit and 800 for barrel polishing. Thirty years ago I made a muzzle loading trap gun and did a jug choke with emery paper and split rod. It seemed to take forever. But that was with steel and a 6" section of barrel and .010 deep. I would never try that again. Glad I found out about Brownells.
__________________
Paul Harm |
||||||
|
|
|
||||||
| The Following User Says Thank You to Paul Harm For Your Post: |
|
10-04-2016, 11:12 AM
|
#40 | ||||||
|
I don’t know much about Parker factory choke profiles but several Parkers I owned and measured had tapered chokes right out to the muzzle, similar to A H Fox guns. Fox used a full taper choke profile during the Philadelphia era and that carried over to about the mid-point of Utica/Fox production. The Fox choking was done from the breech end and the tapered reamer was run in farther toward the muzzle to make increasingly more open chokes: X-Full --> Full --> Modified --> Imp Cyl. Even the “Fox Cylinder” choke had a few thou of tapered constriction depending on the gauge. The same thing could be done from the muzzle using a reverse-tapered "draw reamer" but it's far more complicated and would require a rigid lathe setup or similar.
Just for info, here’s a tapered reamer I made for 12-gauge to open chokes from the breech end and have it absolutely concentric with the bore. It was an expensive setup with the custom made reamer that matches the nominal Fox taper along with a set of bronze centering bushings at .003” increments, starting at .724” diameter for real early Fox guns, and ending at .748” diameter for use in the largest bore Super-Fox guns. The drive rod was made from TG&P steel shafting. Works like a champ and the newly cut choke(s) will essentially duplicate Fox factory work. JFI, I made this up for my own use and am not "in the business". One of these days I’ll get the same setup made up for 20-gauge and maybe for 16. Generally I'm an advocate of leaving factory chokes as made but there are times to open them - and then I want the choke to be tapered and without a straight/parallel section at the muzzle as done with adjustable reamers, just my preference. Personally I don't test shoot the gun for pattern % while doing this work; I did that first off quite a bit but determined to my own satisfaction there's a very good correlation factor between bore and exit diameter at the muzzle, and pattern %. The back end of the reamer has a 1/2" long straight section and then the taper begins. Reamer was just used yesterday and isn't cleaned as yet, some small cuttings in the flutes.  Plenty of length to use in 32" or even longer barrels and still clear the barrel extension.  The drive end is square for a large tap handle 
|
||||||
|
|
|
||||||
| The Following 7 Users Say Thank You to Frank Srebro For Your Post: |
 |
|
|


 Linear Mode
