
|
| ||||||||||||||||||||||||||||||||||||||
 01-14-2012, 09:37 AM
|
#13 | ||||||
|
Mr. Dudley:
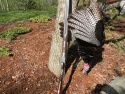
Please consider one additional pic that would help prevent wood chips out of the stock head as the sear pin is removed: As I've posted here before, a bungee cord (or surgical tubing) wrapped between the standing breech and buttplate will hold the action to the stock when the bottom plate is removed. This tension will allow removal of the sear pin and sears without allowing the action to bash around on the stock head and potentially chip off some of the old thin wood. Once the pin and sears are out, remove the bungee cord and the action can be carefully taken from the stock. Safely as well. Best, Kensal |
||||||

|

|
||||||
| The Following 3 Users Say Thank You to John Campbell For Your Post: |
|
01-14-2012, 10:53 AM
|
#14 | ||||||
|
That's a great tip Kensal.
|
||||||
|
|
|
||||||
|
01-14-2012, 03:02 PM
|
#15 | ||||||
|
Supporting the stock with a bungee cord is a great idea. I do not have nearly enough hands to deal with sears and sear springs and pins while keeping the stock in place.
|
||||||
|
|
|
||||||
|
01-14-2012, 03:45 PM
|
#16 | ||||||
|
The pictures have been added to the FAQ section (#34) but without the bungee cord suggested.
|
||||||
|
|
|
||||||
| The Following User Says Thank You to Robin Lewis For Your Post: |
|
01-14-2012, 09:12 PM
|
#17 | ||||||
|
Another disassembly quick tip... take a pin that is a little smaller than the sear pin... I use a finish nail that has the point rounded of...after dry firing gun before disassembly drive sear pin out leaving smaller drift pin in when you get to removing sears just pull it out with your fingers this is also a big advantage assembling gun as you can push the smaller drift in while positioning sear with other hand when gun is back together just tap the sear pin back in driving the temp pin out.
|
||||||
|
|
|
||||||
| The Following 2 Users Say Thank You to E Robert Fabian For Your Post: |
|
01-14-2012, 09:49 PM
|
#18 | ||||||
|
Robert: That's exactly what I do. I use a slightly undersized piece of aluminum stick welding rod that is way over length and has one end bent into a circle for a handle and a bit of a taper ground on the other end. The tapered helps it go in during reassembly as you try to get it through the sears and the aluminum will not nick anything as you push it in and works very well.
|
||||||
|
|
|
||||||
|
01-14-2012, 10:50 PM
|
#19 | ||||||
|
Takes the pain right out of it, you don't need three hands.
|
||||||
|
|
|
||||||
|
01-14-2012, 11:11 PM
|
#20 | ||||||
|
I don't know if anyone else does but I have never seen this mentioned. Once the bottom plate is off and before one drives the sear pin out, to keep the stock head from flopping aroung I put the two stock through screws back in place. The under opening lever screw through the top of the tang will aid greatly and the bottom screw can be screwed back into the top tang.
|
||||||
|
|
|
||||||
 |
|
|


 Linear Mode
