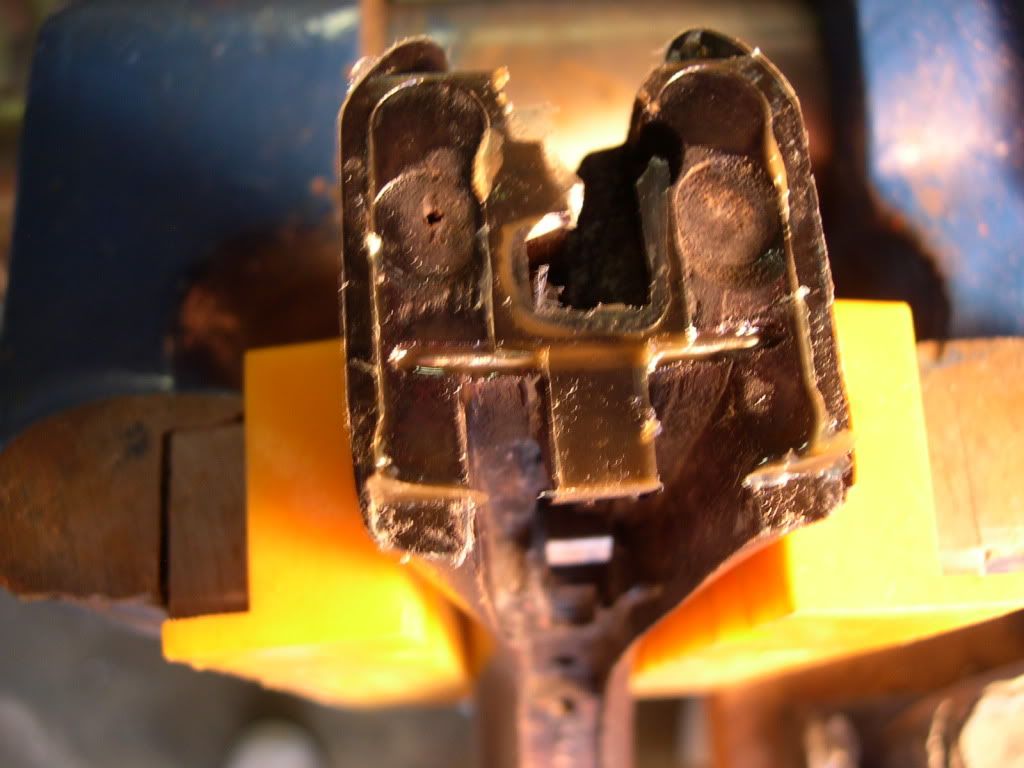
Continuing on, the staple was ready and the receiver and trigger plate had been coated in the appropriate areas with release agent. A small amount of Acraglass epoxy was mixed along with some dye and fiberglass fiber floc for strength. A small pin was used to work some epoxy down into the holes drilled for the staple, then into the channel for the crossbar of the staple, and then finally a little was applied to the staple itself. Then the staple was inserted and driven fully home. A thin coating of the epoxy was then applied to the face of the stock, avoiding any in the circular recesses that allow for tumbler clearance when the gun is cocked. Also enough epoxy was applied to fill-in the channel cut for the staple crossbar. Then the receiver is quickly assembled to the stock without any fumbling or allowing it to slide around and smear the epoxy out of place. It isn't necessary, but I put everything in the stock that will be in there at the end - the safety mechanism, auto-safety rod (if desired), and top wrist-pin ferrule. It is a good idea to practice the assembly of the receiver to the gun a couple times before applying the epoxy so that you can assemble it smoothly, quickly, and without excess movement once you are ready to do it for real. The idea is to press the receiver into place, hold it tightly to the stock while you flip it over and tap the triggerplate in place, and get some screws in it to hold it firmly in place. Then you tighten all the screws down to their working tightness. A common trick of stockers is to not tighten the last 1/16 of a turn (stopping before the slots are fully qualified) until final assembly. It saves wear on the threads and assures that they will be good and tight when they are fully-qualified (slots oriented precisely as they should be). That technique works fine here. When everything is tightened down, the epoxy is allowed to cure at least 12 hrs. I parted this receiver from the stock at around the 15 hour mark. It is always a moderately tense moment, as you hope you didn't overlook something and allow the epoxy to get in somewhere that will "lock" the receiver to the stock. When ready, the screws are removed, the trigger plate is tapped out the bottom of the receiver with a soft aluminum or brass drift, and then the receiver is parted from the stock. It will usually be stuck fairly tightly, but light taps with a plastic hammer will gently jar it loose with some patience. Hold the gun around the wrist using your thumb to press down on the top tang to keep the receiver from falling when it breaks loose, then tap gently in a downward direction on the water table. Eventually you will either feel it start to move, or sometimes they just break free all at once - that's why it's good to have your thumb on the tang to keep it from falling. Once broken loose, you can carefully remove the receiver. Here's what it looks like at that point, before the "flashing" (excess epoxy that has squeezed out) is cleaned up:[IMG]

[/IMG]